Google Glide – Create mobile app in spreadsheets without coding

Arkadiusz Cichurski

Table of contents
- A quick look at the technology
- Creating a worksheet
- Creating the app using the web wizard
– Config menu - Application screen editing
– Selection of ready-made components and their limitations - Publishing the app
- Potential and limitations – Summary
A quick look at the technology
Glide apps is a Google service for creating cross-platform applications without the need to write a single line of code. To create an application, we only need a data sheet on which we want to operate. The rest is just appropriate configuration of the appearance and operations of the application itself. All is done using a web-based wizard.
For the purpose of researching the technology, I set myself a goal of creating an application called “Transfer”, which would allow displaying and adding new items to give away for free to other users.
The application would allow logging into your account using an email address to display and add new items to your existing item base.
The application development with Glide is a 3-step process:
- proper preparation of a data sheet where all necessary data about the items will be stored
- creating an application in a web wizard
- releasing the application by sending a download link to the app
Creating a worksheet
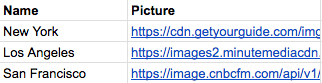
The first step was to create a data sheet representing the database of items and locations used the app.
For this purpose, I created a sheet consisting of 2 parts (items and cities).
The “App: Logins” sheet is shown below. This was generated automatically by the application when logging in using the email address.


Creating the app using the web wizard
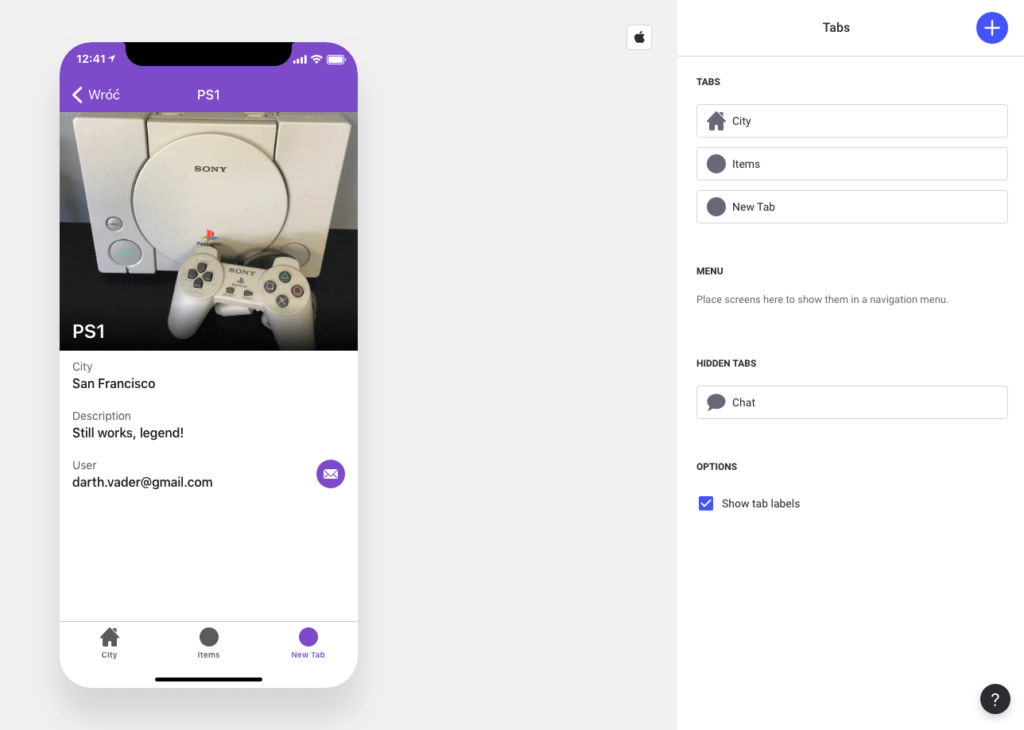
After going to the web wizard and selecting a spreadsheet, our application will be generated, as you can see on the screen above, navigation tabs have been created for cities and objects respectively.
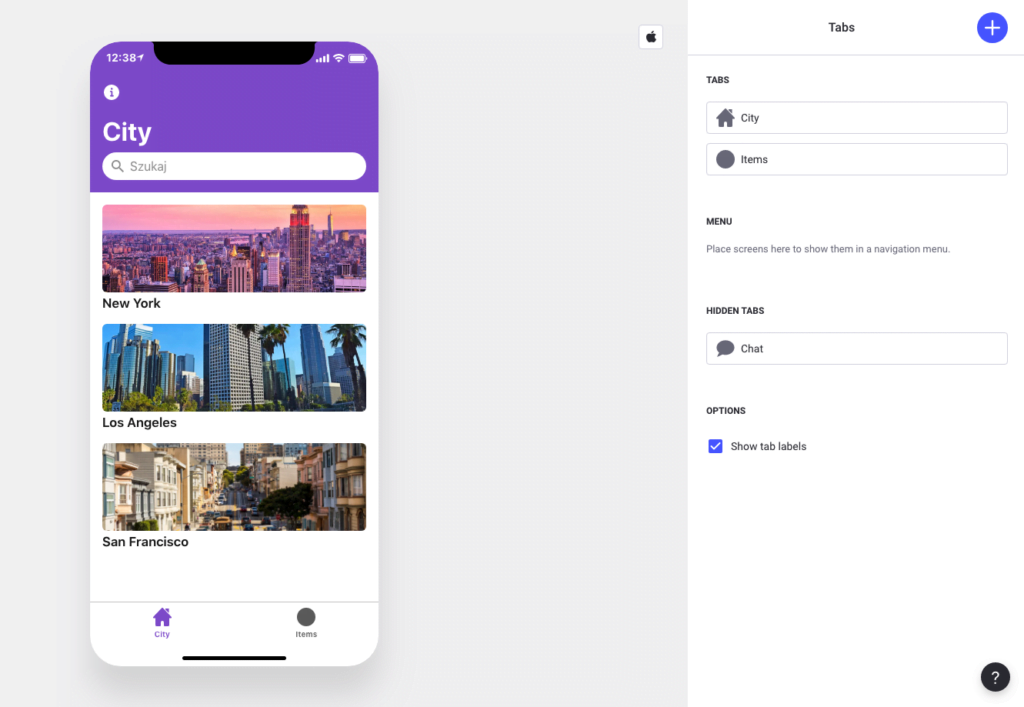
These are not the only options that we can customize using the side menu (see below), we have a choice of what data from the spreadsheet we want displayed and the form they are to be presented in, we can also choose from a variety of color themes – we can apply a dark theme, choose the color of the headers, and customize the appearance of the apps icon). It is also possible to make changes to the sheet itself from the wizard using the Data option.
Config menu
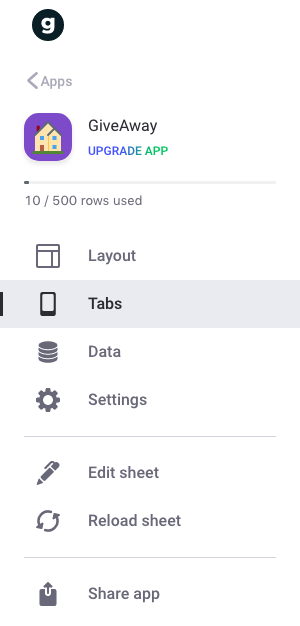
In the application itself, we can change individual elements of each tab.
- Layout – for changing the layout of the displayed data (from the spreadsheet) for the currently displayed application screen
- Tabs – make changes the application navigation system
- Data – a preview of our data sheet with the option of changing/adding simple relations
- Settings – customizing the name, description and layout of the application (color theme)
- Edit sheet – editing the data sheet
- Reload sheet – application update after making changes to the sheet
- Share app – option to share the application
Application screen editing
Selecting a specific application screen and using the layout tab, we can customize our screen using ready-made components that can be added with the + button in the upper right corner of the screen.
Here we can easily decide on the order in which data is displayed by dragging/dropping components so that they meet our requirements.
Selection of ready-made components and their limitations
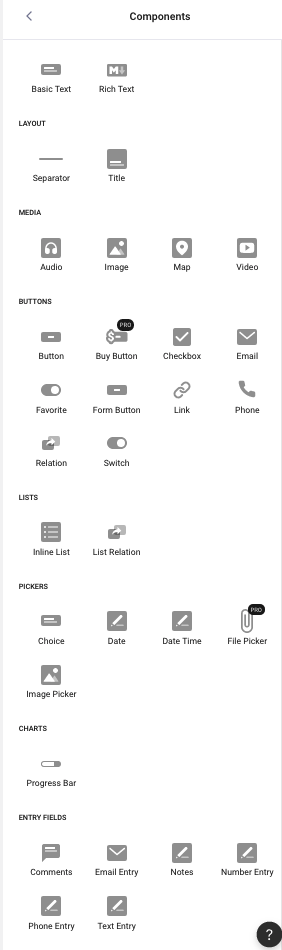
Using ready-made components, we can easily display data from a spreadsheet. It’s not limited to just text, we can easily present photos, locations, enable playback of audio or video files. All you have to do is add the appropriate link in the spreadsheet, and point to the appropriate column in the spreadsheet as the data source when you configure the component.
There are some limitations here.We cannot add or display data in the Glide app which is not in the sheet, all the content must already be in the sheet.
We are not limited to displaying data, using the Form Button component, we can create a form allowing the user to add data to our application.
It’s worth keeping in mind that adjusting the appearance of individual components to your preferences is practically impossible, the only option you get is changing the arrangement of individual components.
Publishing the app
The application publishing process is simple- all you need to do is go to the Share app tab in the wizard and then copy/paste the app’s link. You can now send it out to anyone.
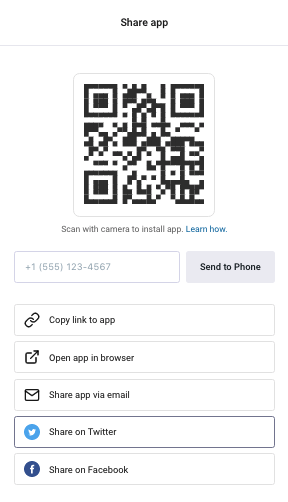
Unfortunately, you don’t get access to the apk files you could later use to publish the application in eg. Google Store.
After clicking the link, the application launches in your phone’s browser and a shortcut is added to the main screen of your phone, giving it a “native app” appearance.
Potential and limitations
GlideApps is an interesting concept, it allows you to create simple applications very quickly. Unfortunately, the technology is still very limited, it does not allow for more complex operations, or to adjust the details of how exactly individual components should look. What caused me problems when testing this technology was also the limitation of the method and choice of what data is sent to the spreadsheet after e.g. sending it via the form. Currently, it is possible to update data only one table at a time and there is no possibility to create more complex relationships between data.
This technology is definitely more applicable in applications presenting some data set that do not require additional logic on the api side. For example, creating a recipe book, a list of company employees, etc.