Creating the User Journey – map of screens as core UX design practice

Piotr Niedźwiecki
Mapping out of app’s screens is one of the core activities in UX design. A screen map is useful far beyond the design process and makes for a valuable asset throughout the development.
Table of contents
- What is a screen map?
– Why make screen maps?
– Examples of screen maps - What is User Flow used for?
– User Flow role
– What is a low fidelity wireframe diagram? - What is the difference between high fidelity and low fidelity wireframes?
- Why use the UI Kit in the UX / UI design process
- Summary
Customer Journey Mapping – the road to be taken within the app to do what you want to do, requires a proper map. The better the map, the more enjoyable the Journey.
What is a screen map?
A screen map is a diagram showing individual application screens, their location (hierarchy) and interrelationships.
Why make screen maps?
The map allows you to visualize how many screens the app will have and show the relations between them. It is invaluable in estimating the workload for the UX / UI design process.
How is a screen map made?
Screen maps can be created using virtually any sketching tool. From good old pen and paper all the way to graphics software like Adobe Photoshop or diagram creators like draw.io or Whimsical – what’s important is that the map is easily and quickly edited, and is clear and legible to designers, developers and clients alike.
Turning user stories into a user journey map
Individual “User stories” are sorted into groups to be included in specific screens of the application. Next, the screens are marked on the map to reflect the hierarchy between them and to visualize actions (transitions) performed by the user.
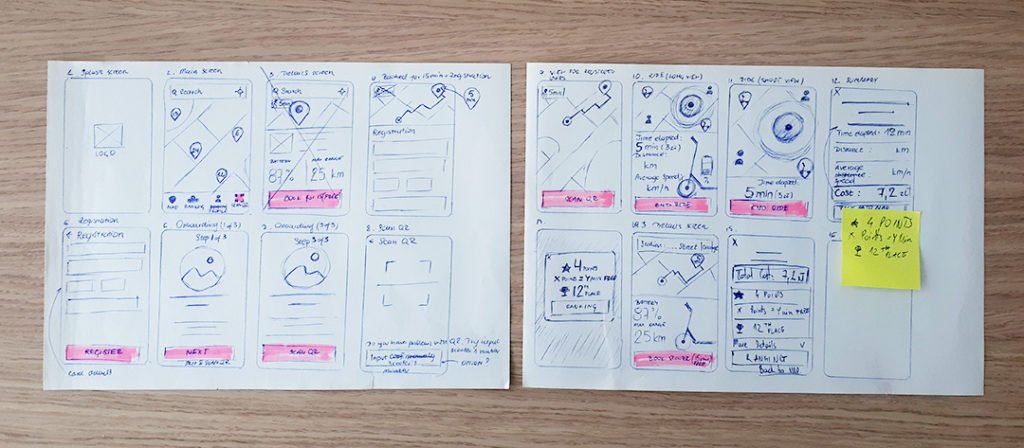
Examples of screen maps
The first example of a screen map.
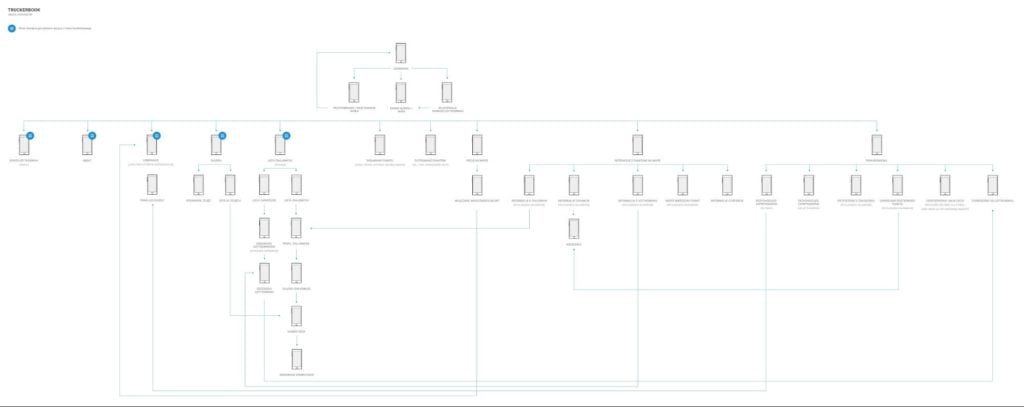
Another example is the product of our UX/UI workshops for a scooter sharing app.
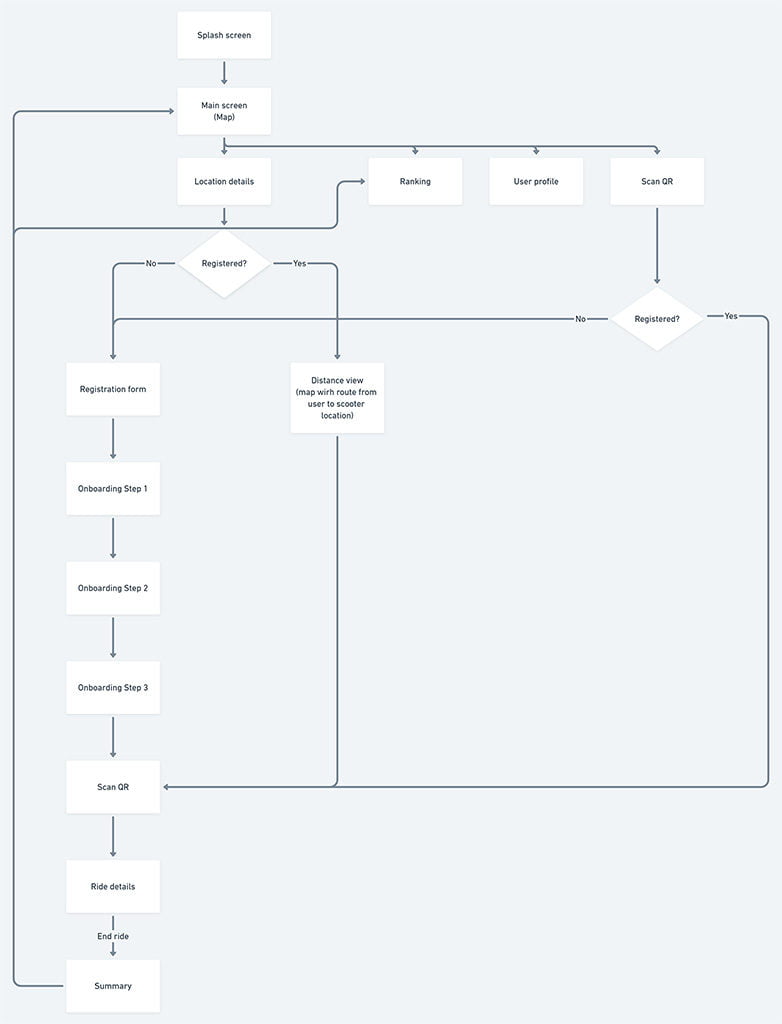
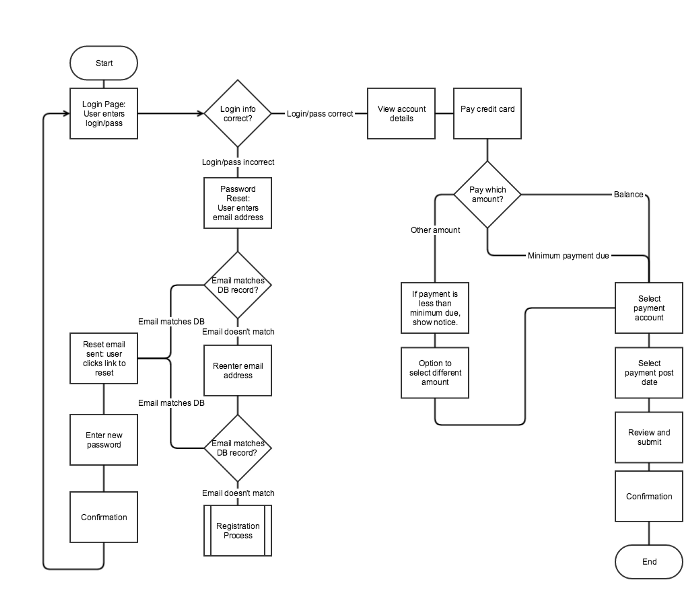
What is User Flow used for?
User flow is a diagram showing the path(s) a User can take in the application. It visualizes the decision making moments and presents all use-case scenarios. The User Flow is helpful in analyzing the ways Users reach their intended destinations or achieve particular goals.
User Flow role
Designing User Flows allows us to adjust and perfect the operation of the app and avoid flaws in interaction between Users and the software.We are able to identify the “Pain points” of the system and improve the process well ahead of development.
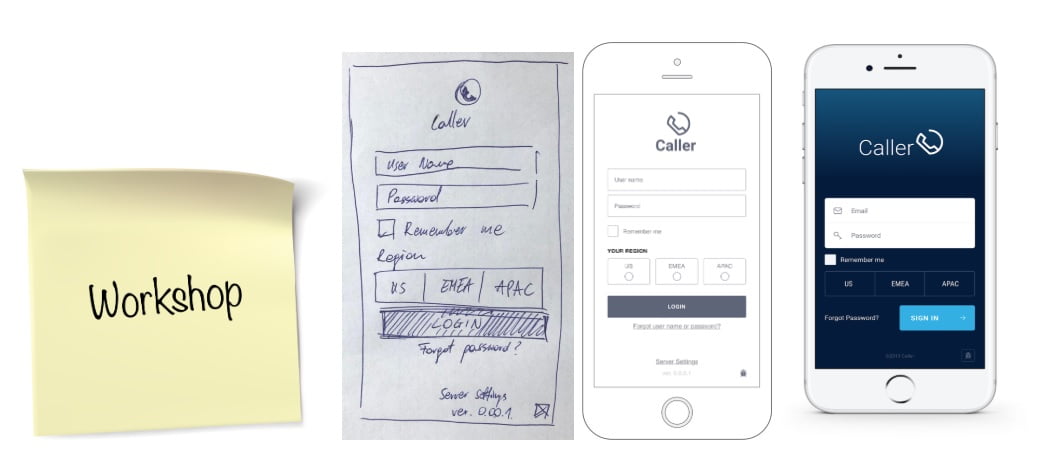
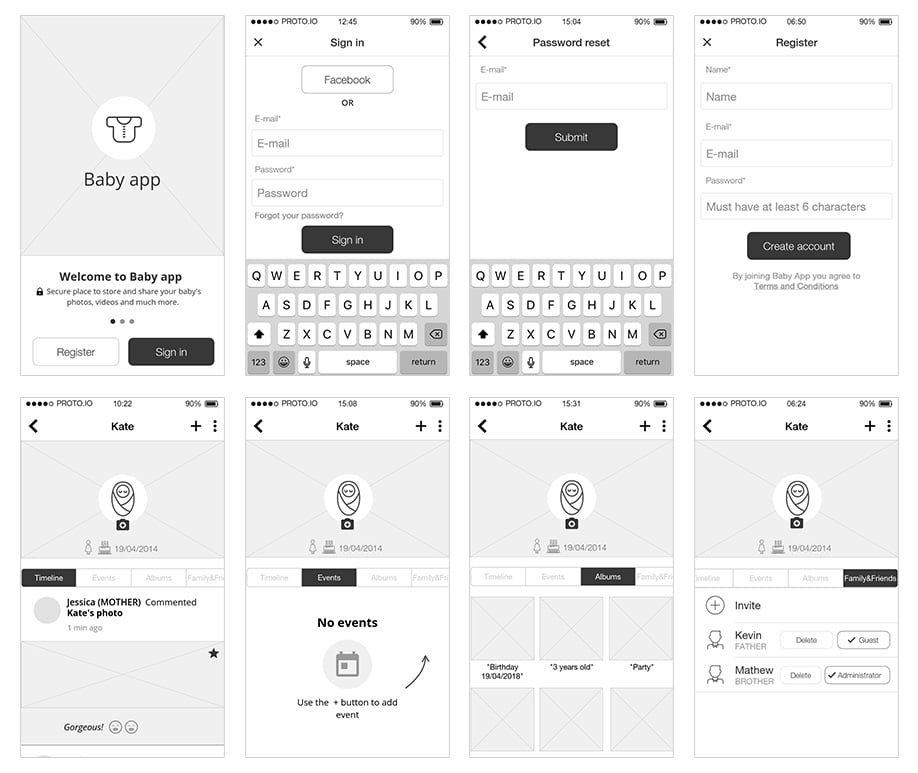
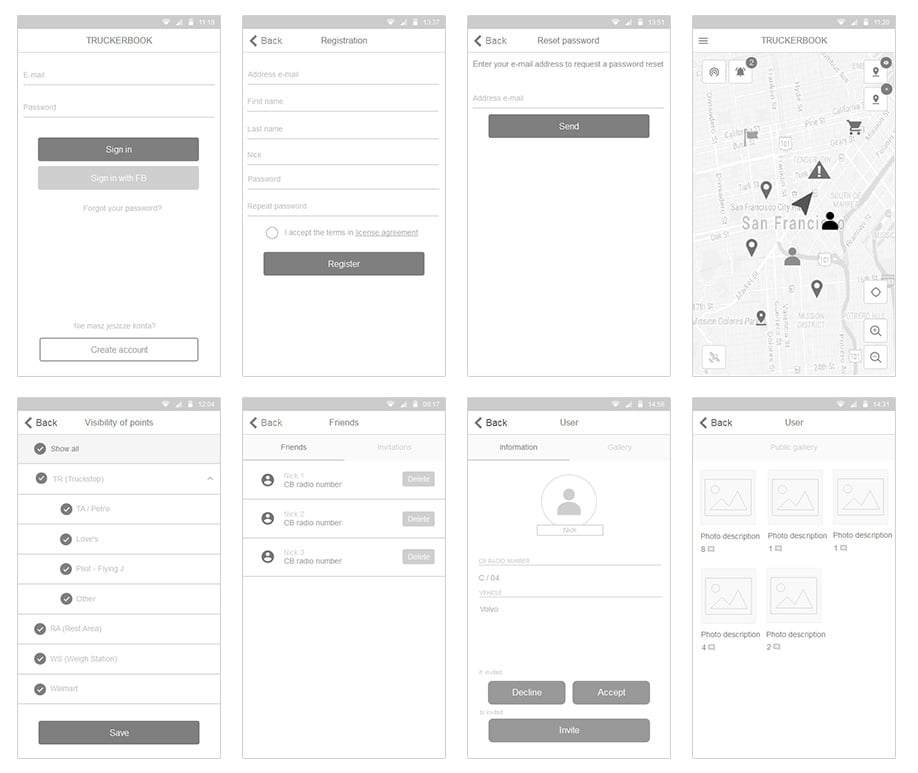
What is a low fidelity wireframe diagram?
Low-fi (low fidelity) Wireframes are a simplified view of the structure of the application screens. The screens are usually presented in grayscale and without details.
Instead of a detailed design, our goal here is to plan appropriate distribution of key UI elements, and their hierarchy. The screens propositions should be easy to draw, edit and copied. Low-fi wireframes creation should be a quick process of establishing a base for team discussion, adjustments and clarification of requirements.
They can be prepared on a piece of paper or in a dedicated program such as: Sketch, Proto.io, UXPin, Axure, Balsamiq. The choice of tools is up to you.
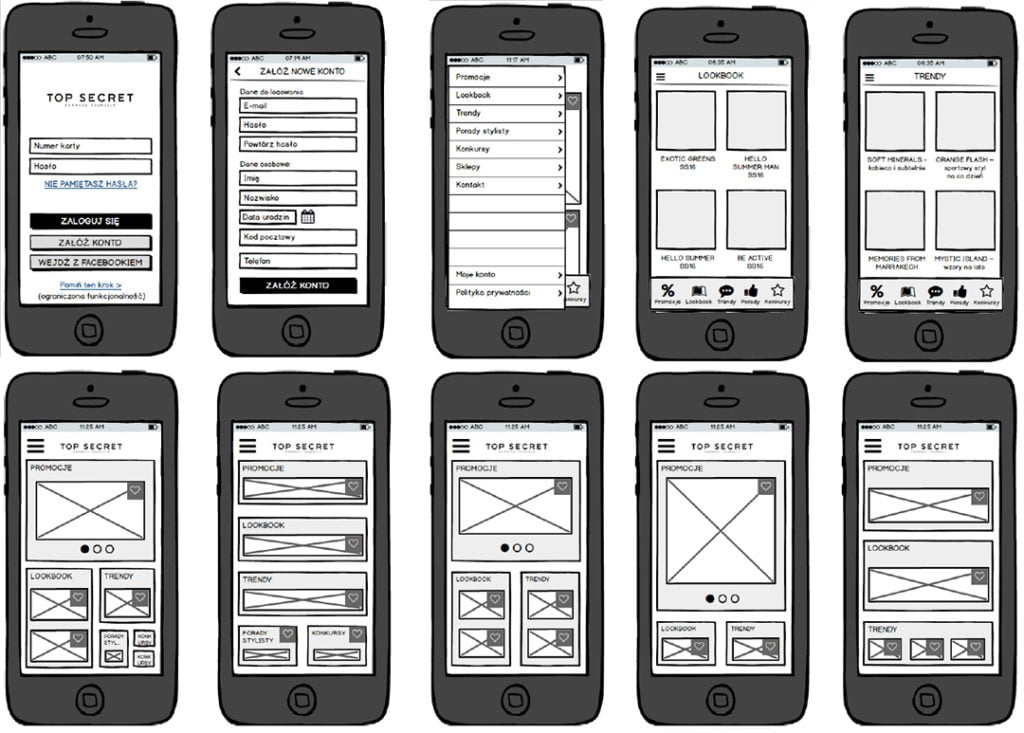
What is a high fidelity wireframe?
High fidelity wireframes expand the low-fi version by refined, platform specific UI elements (iOS, Android, Windows), content and graphics reflecting future appearance of the application.
What is the difference between high fidelity and low fidelity wireframes?
The main difference between these two wireframes is the level of detail.
The low-fi wireframes focus on the general appearance of the main functionalities, without detailing of particular elements, content or pictures using placeholders instead.
Low-fidelity wireframes are not a reflection of the final look of the app. They present the general idea and vision of the application, and need to be made as quickly as possible. They help in discussions with the team and the client in the conceptual process, when determining the scope of work required.
In high-fidelity wireframes, we refine the low-fi screens. Hi-fi is more labor-intensive, as we need a higher level of detail – shapes, content, UI elements, the screen composition and relations between them all must now closely reflect the final look of the app.
High-fidelity wireframes are a more sophisticated representation of what the application’s final look.
Why use the UI Kit in the UX / UI design process
When designing an application interface – the UI for either Android or iOS, you should always keep in mind the differences in appearance between platforms. Some elements of iOS, Android UI differ significantly in both looks and the way they work. Buttons, date pickers, text fields, notifications are all designed differently. The makers of mobile systems – Apple and Google provide complete design guidelines on their websites, as well as ready-to-download components.
To simplify the design process and save time, we don’t usually create new elements from scratch. Designers often use ready-made UI kits and libraries. They contain ready-made elements that can be imported into projects and customized according to needs. Depending on whether you are designing a low or hi-fi wireframe, a variety of UI Kits are available for both iOS or Android platforms.
Summary
Establishing a good base for the UI/UX design benefits your mobile app development in many ways:
- The customer saves time and resources (quick way to verify the product concept),
- A small number of specialists needed to start the process, which translates into lower costs,
- The client takes active part in the design and provides invaluable input on the functionality and appearance of the application,
- The client can verify that the application design is according to requirements and best practices,
- Faster application development time – the team will have a clear picture of how the application is supposed to work and look,
- Ability to test the application early in the production process. A clickable prototype lets you experience the operational functionalities of the app before programming starts,
- Flexibility of the design process – changes and adjustments can be done quickly and without the need of engaging developers work.