Adding Today Extension in 8 steps
Since the announcement of iOS 8 in 2014, quite a few interesting options were introduced for iOS development. One of the App Extensions – the Today Extension allows sharing an app’s functionality with other apps or iOS. Today Extension allows you to display information in either the notification center, search center or lock screen. Its main task is to keep the interaction between users the app going even if the app is not opened.
Table of contents
Step 1: Create a new app project
Step 2: Create a new target for Today Extension
Step 3: Add new label to MainInterface.storyboard
Step 4: Add class body and connect with storyboard file
Step 5: Add code to the file header
Step 6: Copy data loading function
Step 7: Replace viewDidLoad method
Step 8: Compile and run the App
Step 9: (optional): Add Show More/Show Less Functionality
Below, I’m presenting 8 steps to follow in order to add the Today extension to your code.
Let’s start!
Step 1: Create a new app project
Today Extension only works with the main app. To create a new app project, open XCode, select New -> Project -> iOS -> Single View App. After clicking Next, name your project and choose a folder to save it to.
Step 2: Create a new target for Today Extension
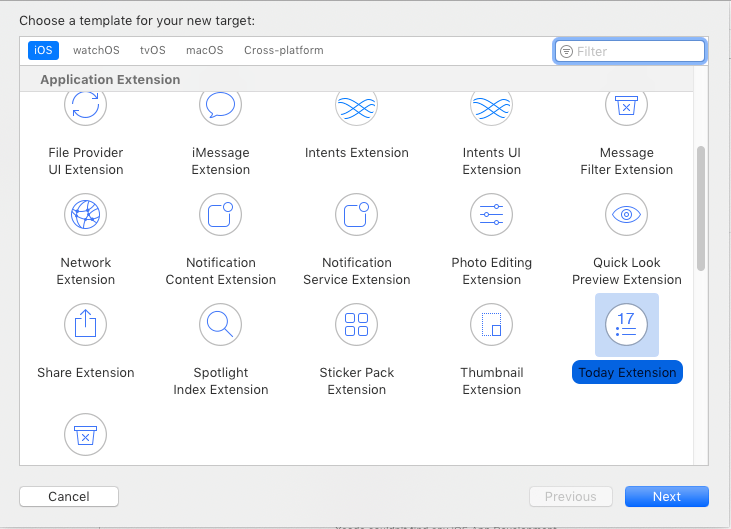
Now you need to create a new target for the Today Extension. You can do this by selecting Editor -> Add Target -> Today Extension on iOS Application Extension section:
In the next view we need to set the Product name, eg. “Extension”. After clicking the “Finish” button in the Project, you will see two targets:
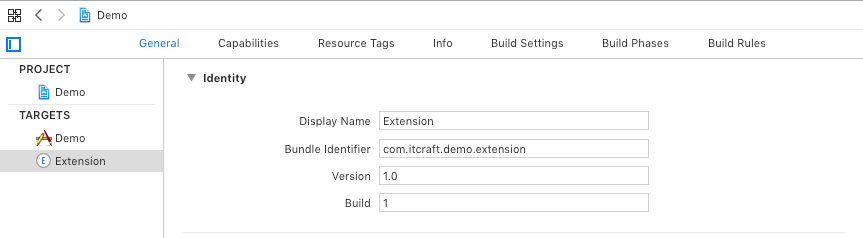
The following files are created:
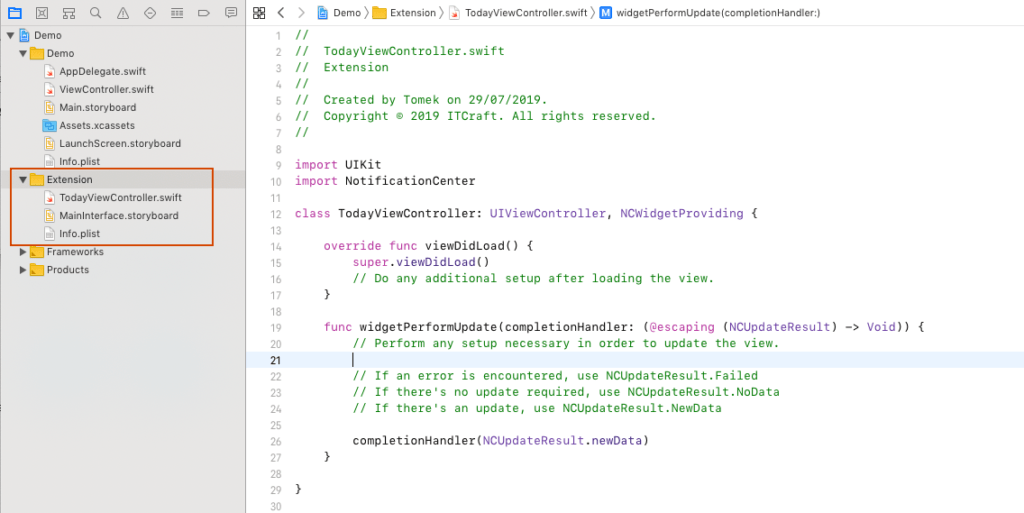
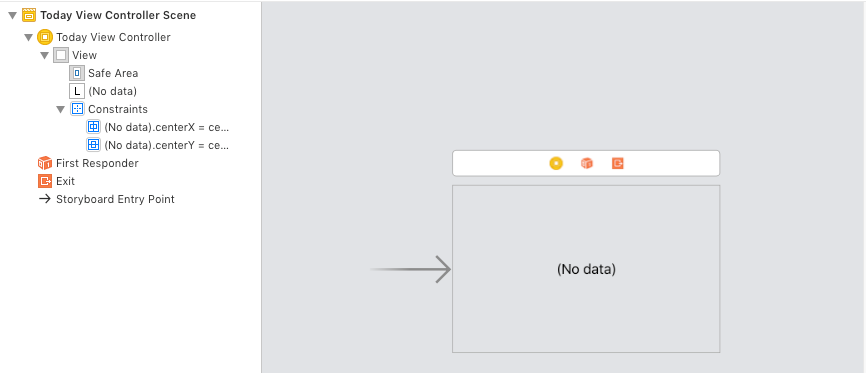
Step 3: Add new label to MainInterface.storyboard
Now open MainInterface.storyboard file, change the height of the view controller to 200, remove the existing label and add a new one in centered position and “(No data)” as the title:
Step 4: Add class body and connect with storyboard file
Go to TodayViewController.swift file, add to class body:
@IBOutlet weak var ipLabel: UILabel!and connect with storyboard file
Step 5: Add code to the file header
Please add the following to the file header:
struct Response: Codable {
    let ip: String
}
Step 6: Copy data loading function
Next, copy the following function to TodayViewController.swift body:
// MARK: - Loading of data

	func loadData() {
		DispatchQueue.global(qos: DispatchQoS.QoSClass.default).async {

            guard let url = URL(string: "https://api.ipify.org/?format=json") else { return }
            URLSession.shared.dataTask(with: url) { data, response, error in

                guard let data = data else { return }
                do {
                    let res = try JSONDecoder().decode(Response.self, from: data)
                    DispatchQueue.main.async {
                        self.ipLabel.text = res.ip
                    }
                } catch let error {
                    DispatchQueue.main.async {
                        self.ipLabel.text = error.localizedDescription
                    }
                }
            }.resume()
		}
	}
this function replaces the “(No data)” label with your API label when internet connection is enabled.
The function is implemented but not used yet.
Step 7: Replace viewDidLoad method
Replace viewDidLoad method with:
 override func viewDidLoad() {
        super.viewDidLoad()

        self.preferredContentSize.height = 200
        loadData()
    }
Call loadData function inside the widgetPerformUpdate method:
func widgetPerformUpdate(completionHandler: (@escaping (NCUpdateResult) -> Void)) {
        // Perform any setup necessary in order to update the view.

        // If an error is encountered, use NCUpdateResult.Failed
        // If there's no update required, use NCUpdateResult.NoData
        // If there's an update, use NCUpdateResult.NewData

        loadData()

        completionHandler(NCUpdateResult.newData)
    }
Step 8: Compile and run the App
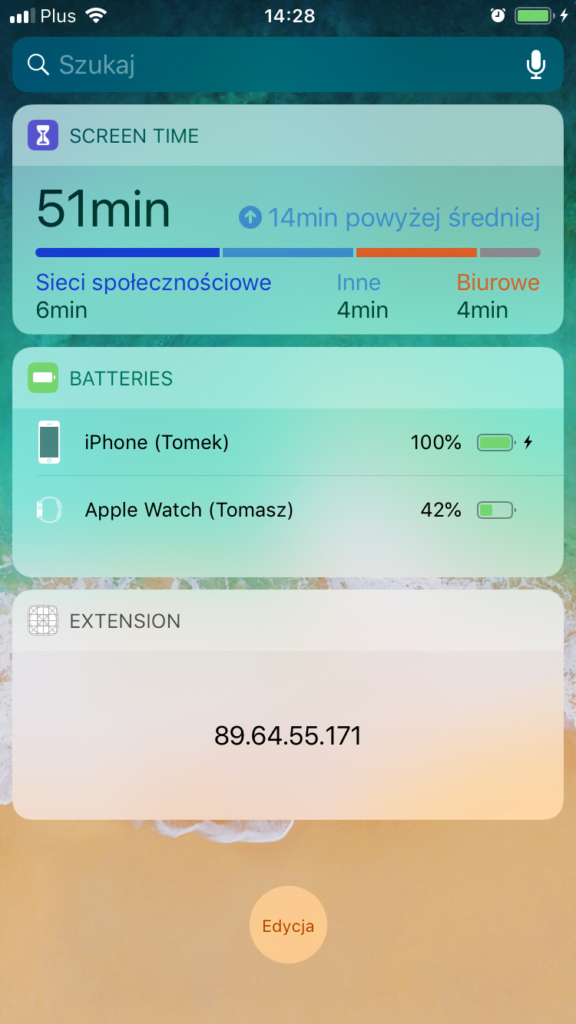
Compile and run the app. When using 3D Touch (hard press) on the app icon you will now see:
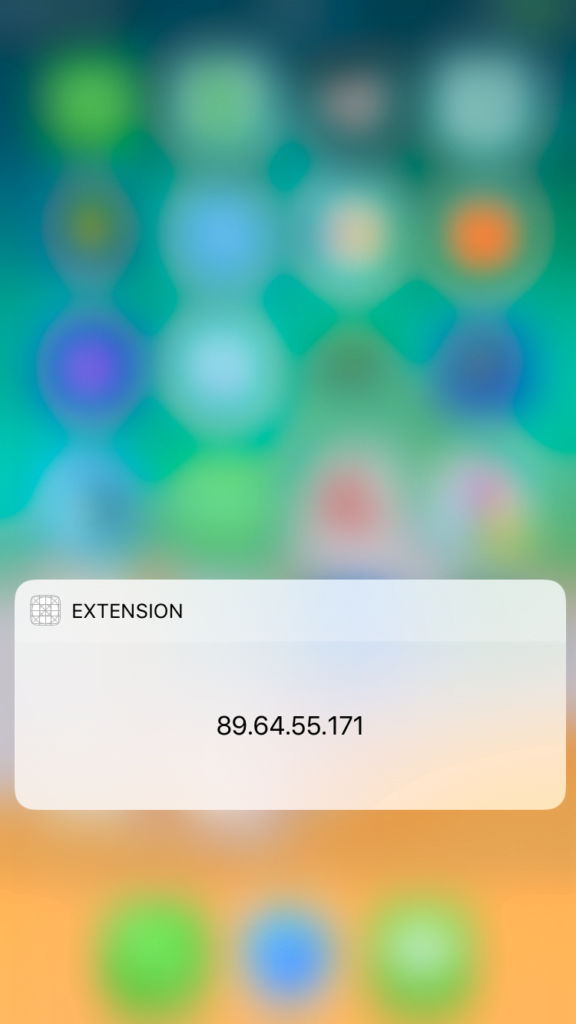
The value is your IP address.
You can also add the widget to your list of widgets visible after swiping left on the main screen:

Step 9 (optional): Add Show More/Show Less Functionality
From iOS10 Apple provided APIs to handle “Show More/Show Less” functionality. If you expand viewDidLoad method:
 override func viewDidLoad() {
        super.viewDidLoad()

		if #available(iOSApplicationExtension 10.0, *) {
			extensionContext?.widgetLargestAvailableDisplayMode = .expanded
		}

		self.preferredContentSize.height = 200

		loadData()
    }

and add this functions to TodayViewController body:

	func widgetMarginInsets(forProposedMarginInsets defaultMarginInsets: UIEdgeInsets) -> (UIEdgeInsets) {
		return UIEdgeInsets.zero
	}

	@available(iOSApplicationExtension 10.0, *)
	func widgetActiveDisplayModeDidChange(_ activeDisplayMode: NCWidgetDisplayMode, withMaximumSize maxSize: CGSize) {
		if activeDisplayMode == .expanded {
			preferredContentSize = CGSize(width: maxSize.width, height: 300)
		}
		else if activeDisplayMode == .compact {
			preferredContentSize = maxSize
		}
	}
you will see: